

Secure Boot: A Guide to Activating Essential Protection
To install Windows 11 or experience new games, Secure Boot is a mandatory requirement. Learn how this security layer works and the steps to enable it in the UEFI BIOS.
What is Secure Boot and why is it important?
Secure Boot is a security standard developed for the UEFI (Unified Extensible Firmware Interface) software interface, designed to ensure that computers only boot using software trusted by the original equipment manufacturer (OEM). Essentially, it creates a "shield" from the moment you press the power button, preventing malware such as rootkits or bootkits from attacking before the operating system is fully loaded.
First introduced with Windows 8, Secure Boot gradually became a basic requirement. With the release of Windows 11, Microsoft made this feature one of the minimum system requirements for installation. In addition, many modern games like Battlefield and Call of Duty also require Secure Boot and TPM (Trusted Platform Module) to operate anti-cheat systems, ensuring a fair competitive environment.
How to check the Secure Boot status on Windows
Before making any changes to the BIOS, you should check if Secure Boot is enabled on your system. There are two simple methods to do this.
Use the System Information tool.
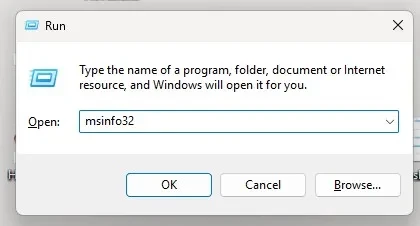
- Press the key combinationWindows + Rto open the Run dialog box.
- Typemsinfo32and press Enter.
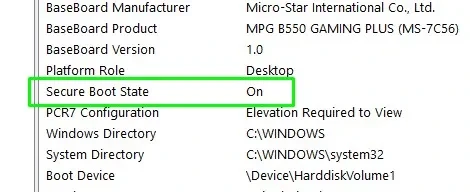
- In the System Information window, find the line"Secure Boot State"If the value is"On"Your system is configured correctly. If so,"Off"You need to enable it in the BIOS.
Use PowerShell
- Right-click the Start button and select"Windows PowerShell (Admin)"or"Terminal (Admin)".
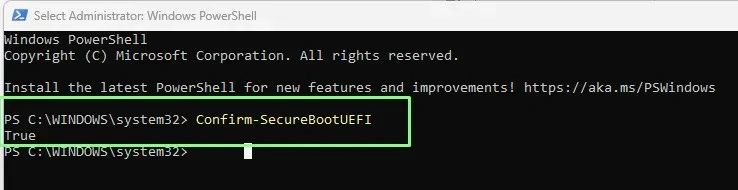
- In the command window, enter the following command and press Enter:
Confirm-SecureBootUEFI - If the returned result is"True"Secure Boot is currently enabled. If so"False"This feature is currently turned off.
Instructions for activating Secure Boot from UEFI BIOS
Enabling Secure Boot requires you to access your computer's UEFI BIOS. This process may vary slightly depending on the motherboard manufacturer, but the basic steps are similar.
- Restart your computer:As soon as your computer starts booting up, press the BIOS access key. Common keys are F2, F10, F12, or Del. You can find the exact key for your machine on the manufacturer's website.
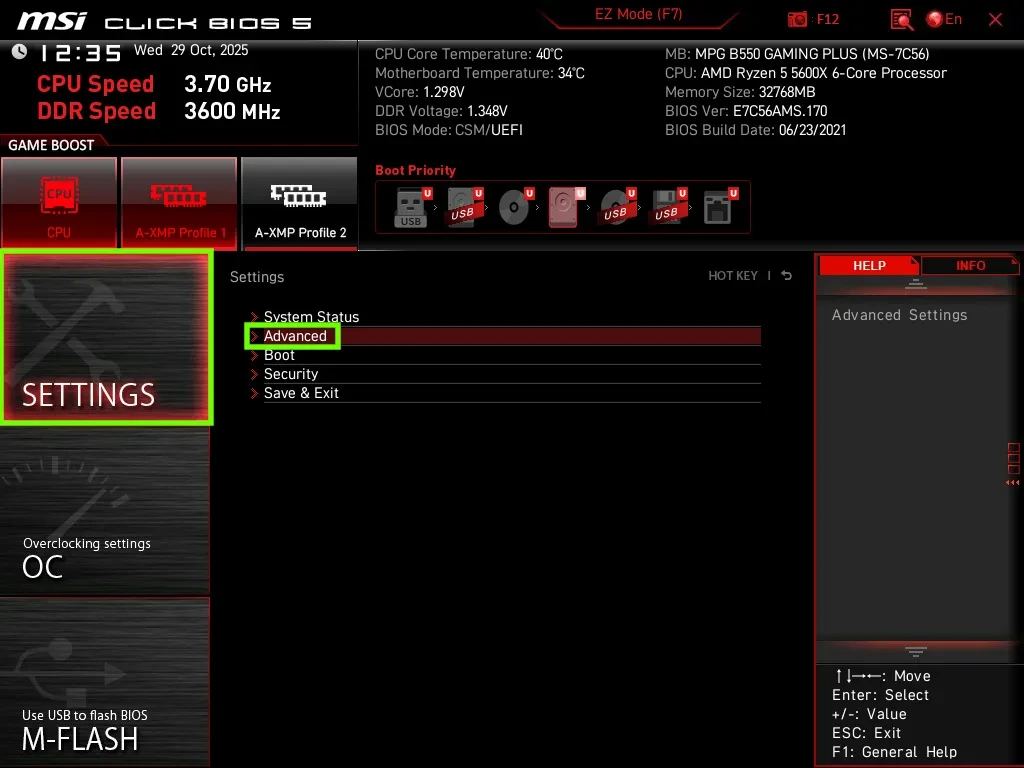
- Find Secure Boot settings:After accessing the UEFI BIOS interface, locate the menu related to security or boot. On an MSI motherboard, the path might be:Settings > Advanced > Windows OS Configuration > Secure Boot.
- Activate the feature:Change the Secure Boot option from"Disabled"wall"Enabled".
- Save and restart:Save the changes you just made (usually by pressing the F10 key) and restart your computer.
Things to note
Although a crucial security feature, enabling Secure Boot can cause some compatibility issues. Some older or unconventional versions of Linux operating systems may fail to boot when Secure Boot is enabled. If you plan to install Windows and a Linux distribution side-by-side, check if your distribution supports Secure Boot before proceeding with the installation. This will help you avoid unexpected boot problems.