

How to set up a secure VPN on Windows in 2026
This guide provides detailed steps on how to set up a Virtual Private Network (VPN) on Windows to protect data, hide your IP address, and enhance privacy in 2026.
In the digital environment of 2026, VPNs have become an essential tool for protecting privacy. Beyond concealing your actual location, VPNs encrypt data on insecure networks and prevent third-party tracking of your browsing activity. Windows offers built-in features that make configuring a VPN quick and efficient.
Preparation before setting up a VPN
To ensure a smooth installation process, users need to make sure their system is updated to the latest version of Windows to avoid compatibility issues. A thorough virus scan and verification of the account's administrator privileges are also crucial preparatory steps.

Here is a list of things you need to prepare:
- Internet connection:Ensure a stable internet connection to avoid interruptions during installation.
- VPN account:Login information (username, password) from a reputable provider.
- Server information:The specific server address is assigned by the service provider.
- Selection protocol:Popular options include OpenVPN, IKEv2, L2TP, or PPTP.
Why should you use a VPN on Windows?
Using a VPN provides several practical layers of security for end users:
- Anonymous:The real IP address is replaced, helping to avoid location tracking.
- Safe transactions:Protect your financial data when making online payments or working remotely.
- Securing public Wi-Fi:Encrypt your data when accessing the internet at airports, cafes, or shopping malls.
- Access to content:Support access to services that are geographically restricted within the limits permitted by law.
Steps to set up a built-in VPN on Windows
Users can choose between a dedicated application from the vendor or using the operating system's built-in tools. Below is a 3-step setup process using the built-in feature:
Step 1: Access network settings
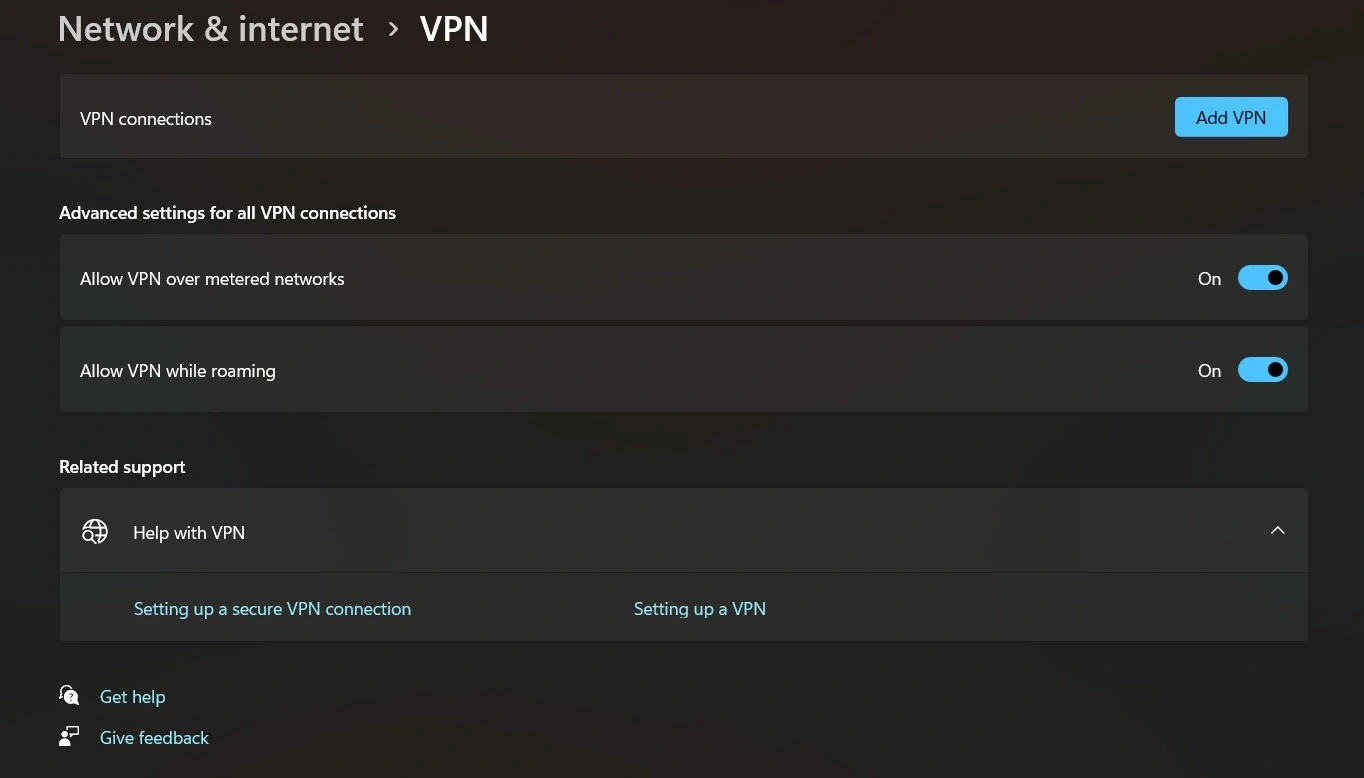
First, click the Start button and open the menu.adjustingThen, navigate to the item.Network & Internetand select the tabVPNThis is where all virtual private network connections on the device are managed.
Step 2: Configure the new connection
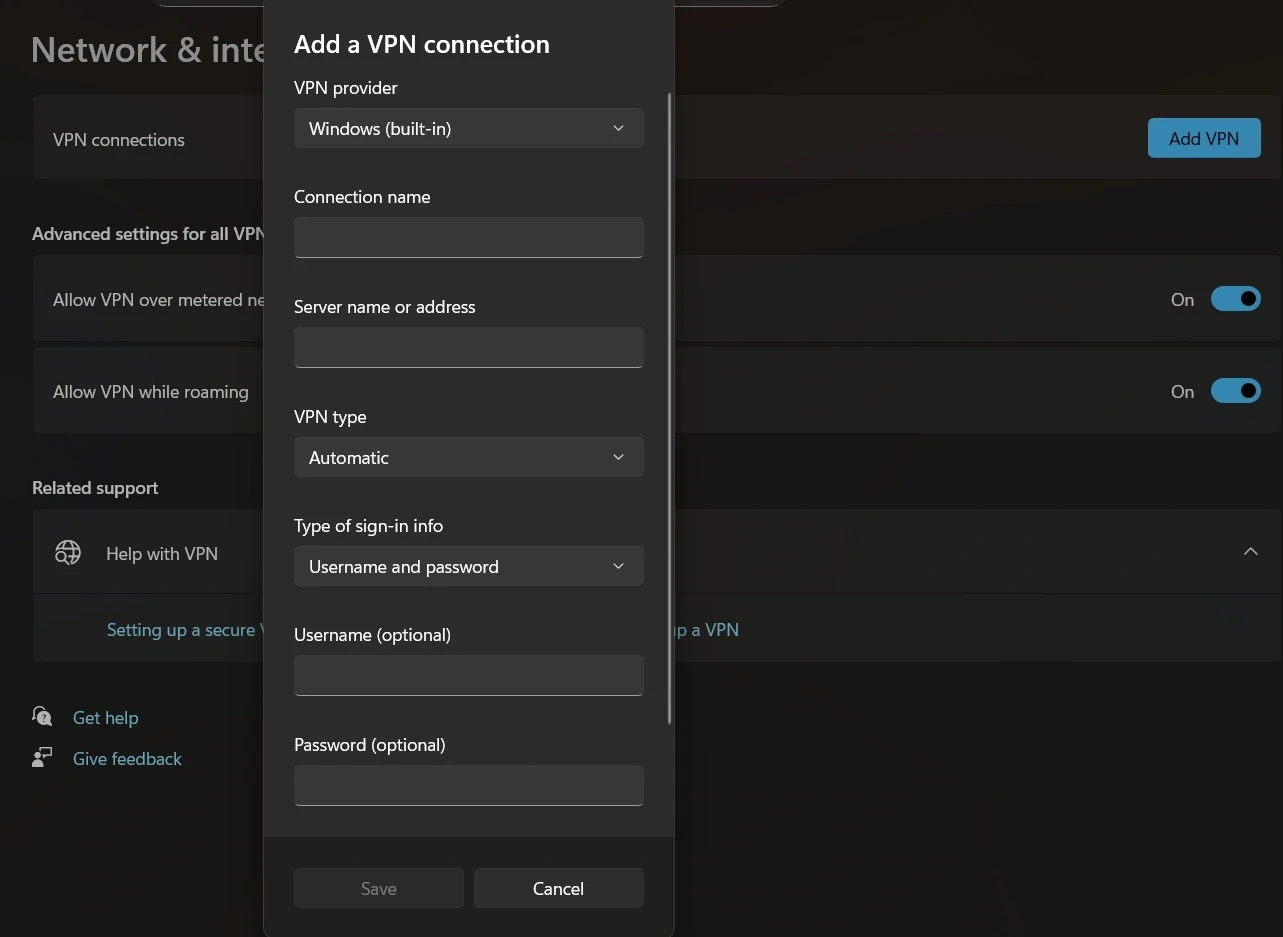
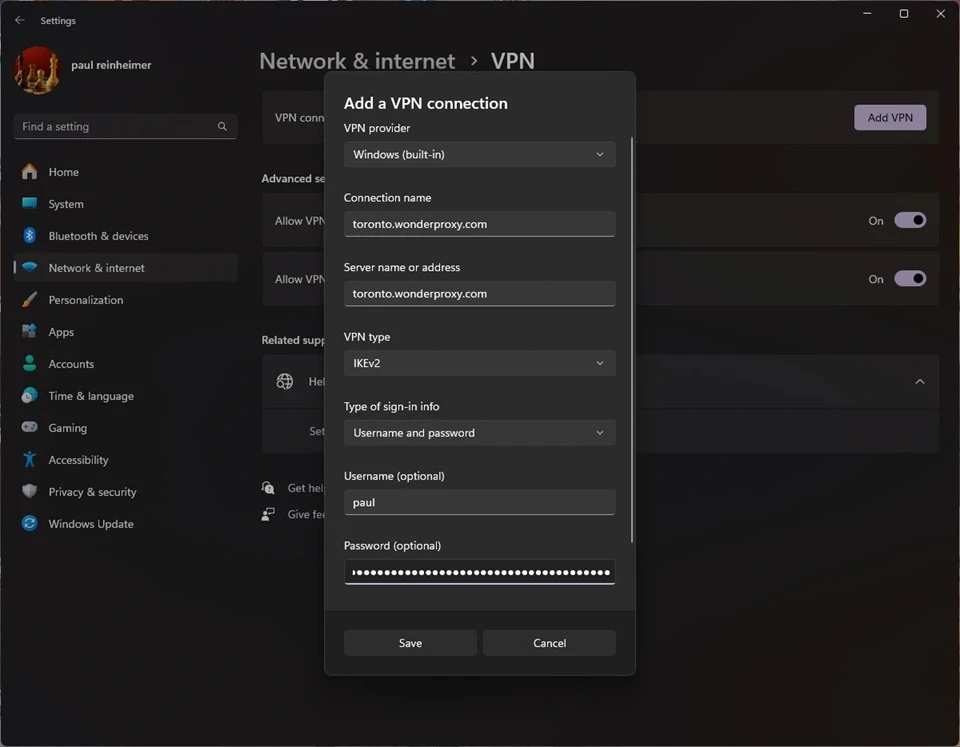
SelectAdd a VPN connectionand fill in the information on the form that appears:
- VPN provider:Select Windows (built-in).
- Connection Name:Give the connection a memorable name.
- Server name or address:Enter the server address provided by the provider.
- VPN type:Choose the appropriate protocol type (IKEv2 or L2TP/IPsec recommended).
- Type of sign-in info:Enter your account username and password.
Step 3: Activate the connection
After saving the configuration, the VPN name will appear in the list. Users simply need to press it.ContactTo begin a secure session. When the status changes to "Connected," all internet traffic is protected.
Optimize advanced VPN security.
To enhance safety, users should also apply the following tips:
- Activate the Kill Switch:Automatically disconnects the internet if the VPN connection is interrupted to prevent data leaks.
- Preventing DNS leaks:Use online testing tools to ensure DNS requests are not exposed outside the encrypted tunnel.
- Use Split Tunneling:Allows you to separate which applications go through the VPN and which go directly to optimize speed.
- Limitations of free VPNs:Prioritize paid services to ensure a no-log policy and stable speeds.
| Protocol | Security level | Speed | Main features |
|---|---|---|---|
| IKEv2 | High | Very fast | Stable connection when switching networks, good for mobile. |
| OpenVPN | Very high | Medium | Open source, the most secure |
| L2TP/IPsec | Medium | Fast | Easy to set up on Windows |
| PPTP | Short | Very fast | The protocol is outdated and vulnerable to attacks. |
Mastering VPN settings on Windows not only helps protect personal information but also provides complete peace of mind when navigating the increasingly complex online environment of 2026.