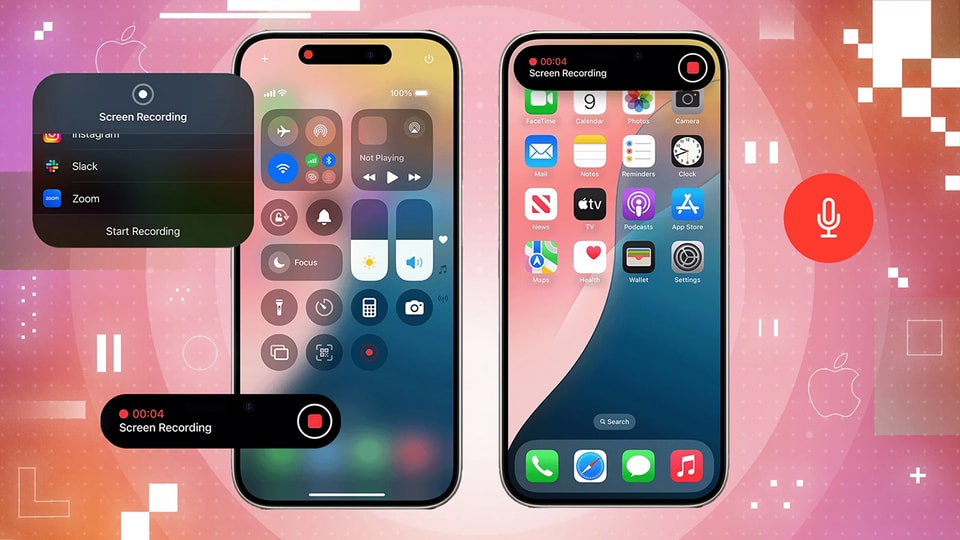
How to easily record your iPhone screen with sound without an app.
This guide shows you how to activate iPhone screen recording with system and microphone audio in just a few simple steps, making your videos more dynamic and professional.
Screen recording is an essential feature that allows users to save instructions or moments on their phones. However, many users often only record images without sound. Below is a detailed guide on how to activate the microphone to record screen videos with sound on iPhone without installing any third-party apps.
Detailed step-by-step instructions
To begin screen recording with audio, you need to ensure this feature is integrated into the Control Center and that the microphone mode is properly activated.
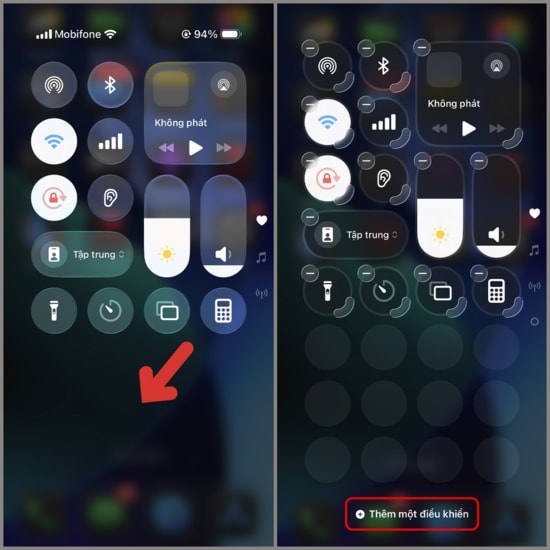
Step 1: Add the feature to the Control Center
To add screen recording functionality, swipe down from the top right edge of the screen to open the Control Center. Here, press and hold on any empty space, then select [option].Add a control.
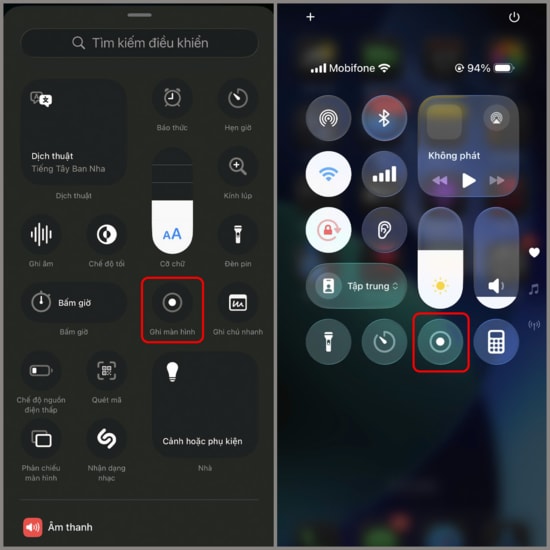
Step 2: Set up Screen Recording
In the list of options, you find and selectScreen recordingTo add it to the Control Center, you'll need to find the circular icon for this feature and...press and hold(Do not tap quickly) on that icon.
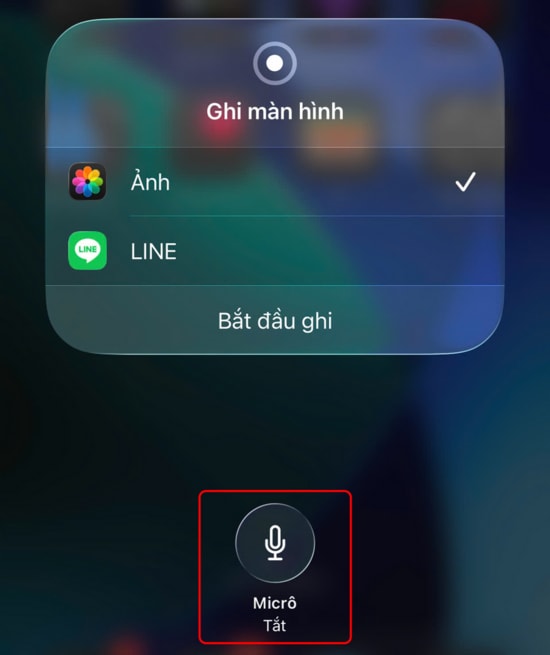
Step 3: Turn on the microphone and start recording.
On the interface that appears, click on the icon.Microphoneto change stateTurn on(The icon will turn red). Once complete, you can begin recording your screen with full external and system audio.
After the recording process is complete, the video will be automatically saved to the application.ImageThis method works effectively on iPhones running the latest software version, saving time and ensuring the best sound quality.

