Light painting technique: Creating unique Christmas images
This detailed guide shows you how to use long exposure techniques to create stunning Christmas images from light trails, using only a camera and a flashlight.
Transform Christmas Eve into a work of art.
Light painting is a creative photography technique that uses a portable light source to paint on the space while the camera is performing a long exposure. It's a fun way to create unique Christmas photos with sparkling Christmas trees, stars, or greetings that you've created yourself.
This technique requires patience and experimentation, but the results are well worth the effort. Below is a detailed guide to help you get started.
Equipment needed for the photoshoot
To perform this technique, you will need to prepare the following basic equipment:
- Camera:A long exposure mode is needed, ideally Bulb mode (B), which allows you unlimited control over the shooting time.
- Remote control:It helps lock the shutter open without touching the camera, preventing camera shake.
- Tripod:A sturdy tripod is essential to keep the camera perfectly stable throughout the exposure.
- Warm clothes:The photoshoots usually take place outdoors at night and can be quite cold.
- Flashlight:It helps you see the camera buttons clearly in the dark.
- Light source:This is your "paintbrush." You can use a flashlight, a multi-colored LED light, or any other portable light source.
Tips for setting up and focusing your camera at night.
Proper setup is key to a sharp photograph. First, place the camera on a tripod and choose your desired framing. Focusing in low light can be a challenge.
If the camera cannot autofocus, use a flashlight to shine on the location or person you intend to draw. This light will help the camera determine the focus point. Once successful, switch the lens to manual focus (MF) mode to lock the focus at that location.
If you want the background (like a wall) to be clearly visible in your photo but the lighting isn't sufficient, you can try one of two methods: take two separate photos – one for the light trail and one for the background – and then combine them using editing software. Or, you can use the flash in "rear curtain sync" mode, where the flash will fire just before the end of the exposure to highlight the background.
Steps to perform the light drawing technique
Once the preparation is complete, begin the "drawing" process. Ask your assistant to practice drawing the desired shape to ensure the drawing time does not exceed the set exposure time and the drawing fits neatly within the frame.
Begin by setting the shutter speed to approximately 30 seconds if not using Bulb mode. Press the shutter button and signal your assistant to begin drawing. The artist needs to move the light source steadily and continuously to create a series of interconnected light trails.
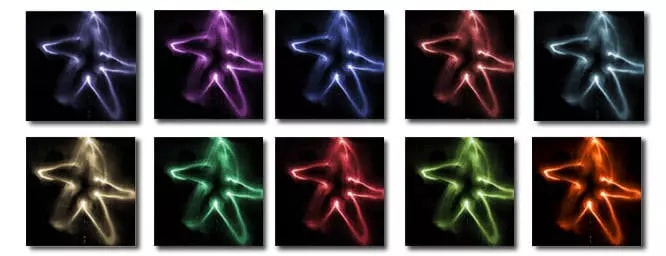
To add more interest, you can change the color of the light by using colored gel sheets or even frosted candy wrappers around the flashlight. Alternatively, you can adjust the colors in post-production using software like Photoshop.
Fine-tune for the perfect photo.
Getting the picture you want might require several attempts. Sometimes, fitting the two ends of a drawing together neatly and precisely can be quite challenging.
If the light streaks in the image are too faint, ask your assistant to slow down or you can open the aperture wider. Conversely, if the light streaks are too bright or too dense, ask them to draw faster or close the aperture. A helpful tip is to sketch an outline on the wall with chalk for the artist to follow, which will help ensure a more accurate image.

