
Disable driver signature verification in Windows 11: A safe guide.
This guide provides detailed instructions on how to disable driver signature enforcement on Windows 11 when installing older or custom drivers, while also clarifying potential security risks.
Learn about driver signature enforcement on Windows 11.
On Windows 11, the "Driver Signature Enforcement" feature is a core security mechanism that ensures only drivers authenticated and digitally signed by Microsoft can be installed on the system. This helps protect the computer from malware or unstable drivers that could cause serious system errors.
However, in some exceptional cases, users may need to temporarily disable this feature. Common situations include:
- Install drivers for older hardware devices that are no longer officially supported by the manufacturer.
- Using custom or unsigned drivers that are still under development.
- Troubleshoot issues related to a specific driver from a trusted source.
It's important to emphasize that disabling this protection can make your system more vulnerable to attacks. Therefore, this should only be done if you have complete confidence in the origin and integrity of the driver you are about to install.
Disable driver signatures via Advanced Startup Options.
This is a safe and recommended method because it only disables the signature verification feature for a single work session. The system will automatically re-enable it after the computer restarts.
- Openadjustingon Windows 11.
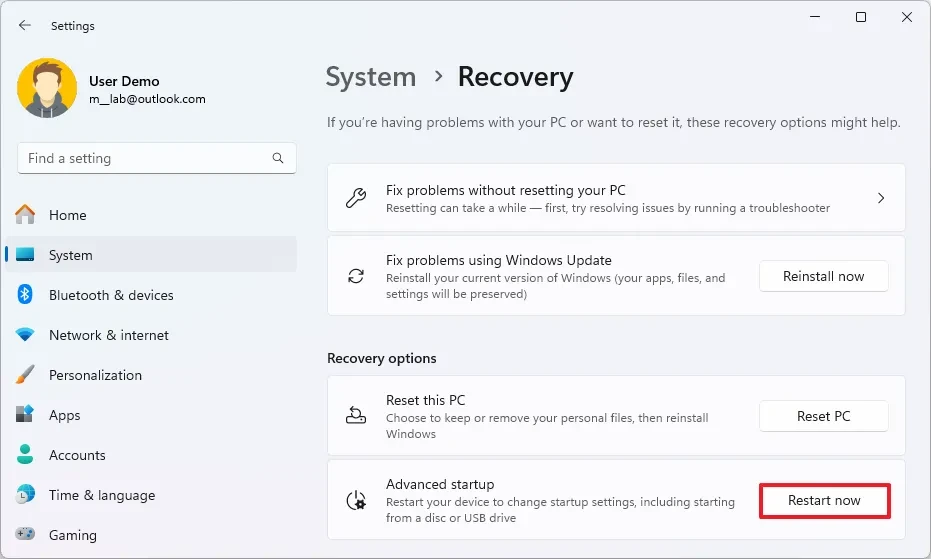
- Navigate to the itemSystemand select the tabRecovery.
- In the “Recovery options” section, find “Advanced startup” and click the button.Restart now.
- After the computer restarts into the Windows Recovery Environment (WinRE), selectTroubleshoot.
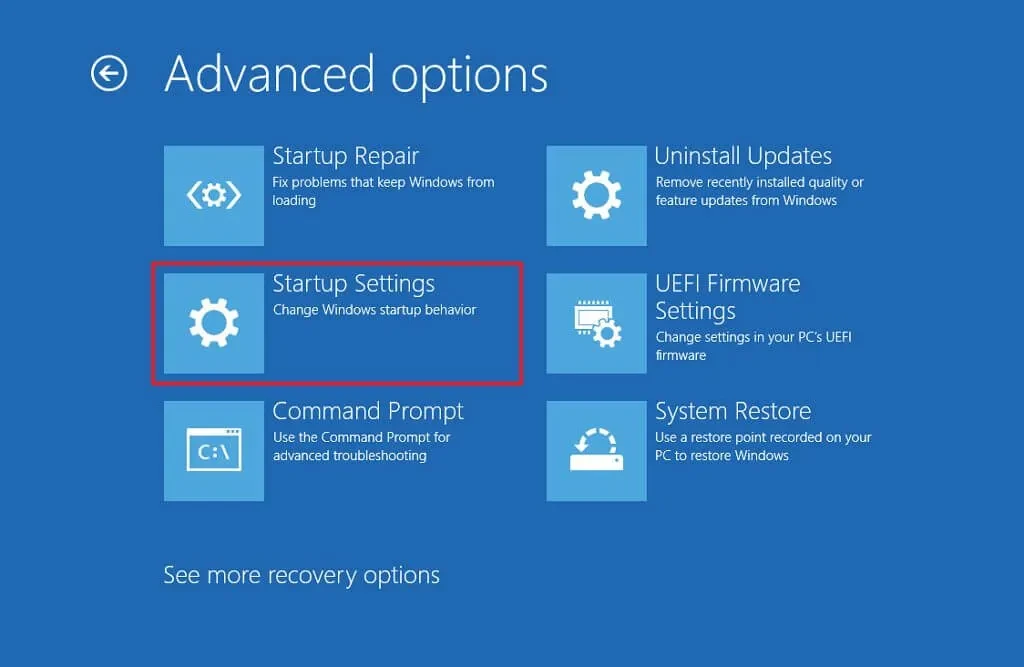
- Next, selectAdvanced options.
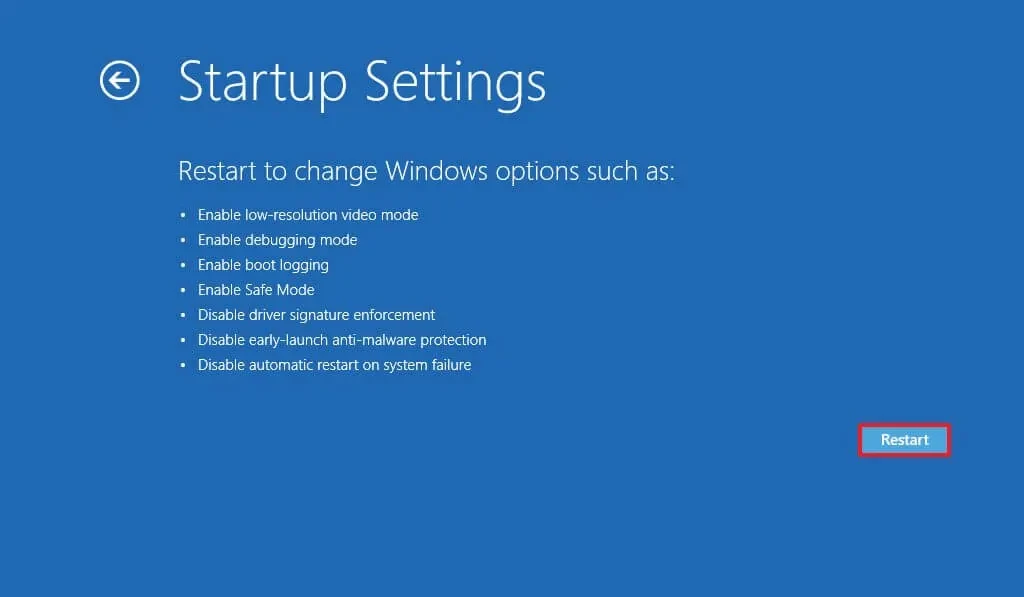
- SelectStartup Settings.
- Click the buttonRestartTo restart the computer again.
- When the Startup Settings screen appears, press the key.7orF7to select an optionDisable driver signature enforcement.
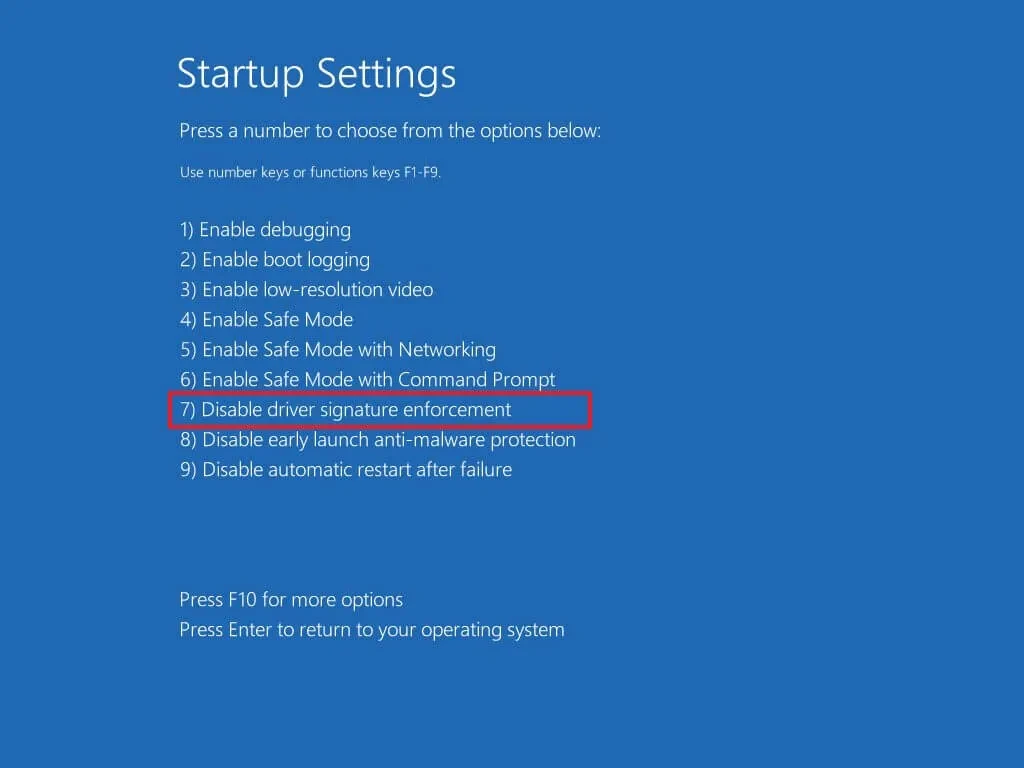
Once complete, Windows 11 will boot into normal mode, but with the signature verification feature disabled. You can then proceed to install the necessary drivers. On the next restart, the security feature will be automatically re-enabled.
Disable permanently using Group Policy Editor.
This method will permanently disable the signature verification feature and is only available on Windows 11 Pro, Enterprise, or Education editions. Please carefully consider the security risks before proceeding.
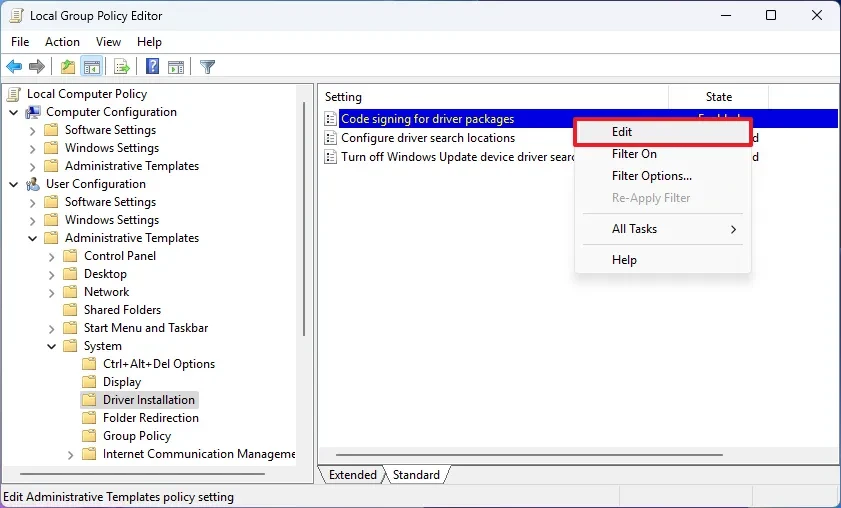
- Open menuStarttype
gpedit.mscand press Enter to open the Local Group Policy Editor. - Navigate to the following link:
User Configuration > Administrative Templates > System > Driver Installation. - In the right pane, double-click on policies.Code signing for device drivers.
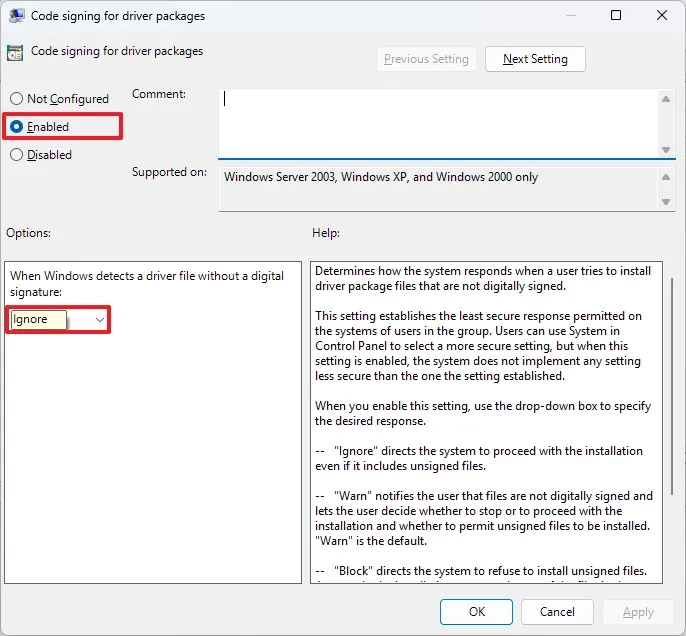
- In the new window that appears, selectenabled.
- In the “Options” section at the bottom, selectIgnorefrom the dropdown menu. This option allows the system to skip the signature check and install unsigned drivers.
- Click hereApply, then selectOK.
- Restart your computer for the changes to take effect.
To undo the changes, simply repeat the same steps and select the option.Not Configuredat step 4.
Important notes regarding the bcdedit command and Secure Boot.
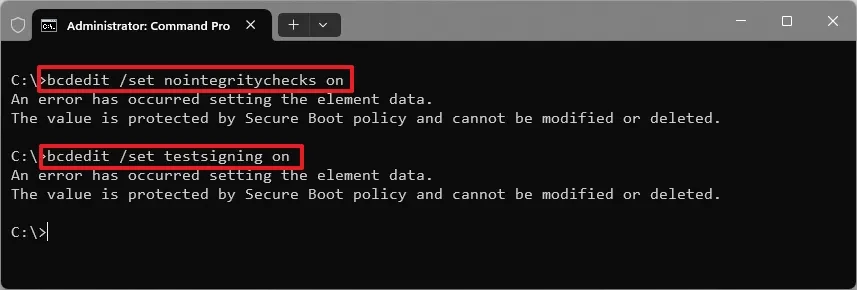
Some older manuals may mention using commands such asbcdedit /set testsigning onin Command Prompt. However, on modern Windows 11 systems with Secure Boot enabled, using these commands often fails or may cause boot errors. Therefore, the two methods mentioned above are a more reliable and safer approach.