14 steps to change car tires properly
Being stuck on the road with a flat tire is one of the things that many drivers dread. However, the actual operation is not so complicated as to be impossible.
Changing a tire on your own without the help of others is something many drivers wish for. Luckily, this operation is quite simple if you are prepared and have a little effort, according to Wikihow's instructions.
Step 1: Find a flat, solid and safe place
 |
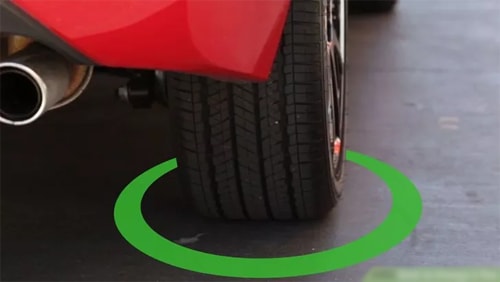
You should change a tire on a flat, stable surface to avoid the risk of the vehicle rolling off the road while you are doing this. If you are near a road, move the vehicle away from traffic and turn on your hazard lights. Remember to avoid soft ground and slopes.
Step 2: Pull the handbrake and put the gear lever in P
For manual transmission vehicles, place the gear lever in 1st or reverse gear (R).
Step 3: Insert heavy objects into the wheel
Place a heavy object (rock, concrete, spare tire...) in front and behind the rear wheel.
Step 4: Get the spare tire and jack the car
Place the jack under the car, near the wheel that needs to be replaced. Make sure the jack is in contact with the metal part of the car's chassis, avoiding any plastic parts that may crack when lifting the car. If you need to know the correct location, consult the owner's manual that came with the car.
On most modern cars with unibody construction, there is a marked spot just behind the front wheels or in front of the rear wheels where the jack should be placed. On most trucks and older cars, place the jack against one of the frame beams, just behind the front wheels or in front of the rear wheels.
Step 5: Raise the vehicle to a height high enough to change the tire.
The jack should be firmly in place and not raised too high at the vehicle's elevation. Check to make sure the jack is perpendicular to the ground.
Step 6: Remove the wheel hub cap and loosen the screw by turning counterclockwise.
Don't loosen all the way, just enough to break the resistance. Keeping the tire on the ground as you loosen the lugs will ensure you're turning the lugs instead of the wheel.
Use the wrench that came with your vehicle or a standard cross wrench. Using the correct size wrench will make loosening the bolts easier. It is a good idea to have the correct size tools, especially for long trips.
It may take some force to remove the screw. If this fails, you can use your body weight or step on the wrench to apply more force (making sure to turn it counterclockwise). However, this may strip the screw groove, making it difficult to service.
Step 7: Raise the jack to lift the tire off the ground.
Raise the jack to the correct height to remove the flat tire and install the spare. When raising the jack, make sure the vehicle is level and secure. If you notice any imbalance, lower the jack and correct the problem before continuing. If you notice the jack is no longer perpendicular to the ground or is slipping, stop and stabilize before continuing.
In addition to the standard jack, you should also bring a hand jack (small hydraulic jack) in case the main jack is damaged.
Step 8: Remove the screws
Turn the screw counterclockwise until it comes loose. Remove all screws.
Step 9: Remove the tire
Place the flat tire under the vehicle to prevent damage to the undercarriage or brakes if the jack fails mid-flight, and to prevent injury to yourself.
The tire may be stuck due to rust. You can use a rubber hammer to gently tap from the inside, or use the spare tire to gently tap from the outside to impact it.
Step 10: Install the spare tire onto the axle
The spare tire must be correctly mounted on the axle and aligned with the bolts, before re-installing the lug nuts.
Step 11: Use your hand to tighten the screw until it cannot be tightened any further.
Then use the wrench to tighten as much as possible. To ensure the tire is balanced, do not tighten each bolt completely. Instead, go in a star pattern and tighten each bolt a little at a time until the tightness is the same.
Avoid using too much force as this may cause the jack to tip over. You should tighten the bolts as much as possible when the vehicle is fully on all four wheels.
Step 12: Lower the vehicle but not all the way
Tighten the screws as much as possible.
Step 13: Lower the vehicle to the ground and remove the jack.
Finish tightening the bolts and reinstall the hub cap.
Step 14: Put the broken wheel in the trunk and take it to the mechanic later.
Estimate the cost of repairs. A small puncture won’t cost much. But if the tire can’t be repaired, you’ll have to spend a pretty penny on a new tire.
According to VNE
| RELATED NEWS |
|---|


